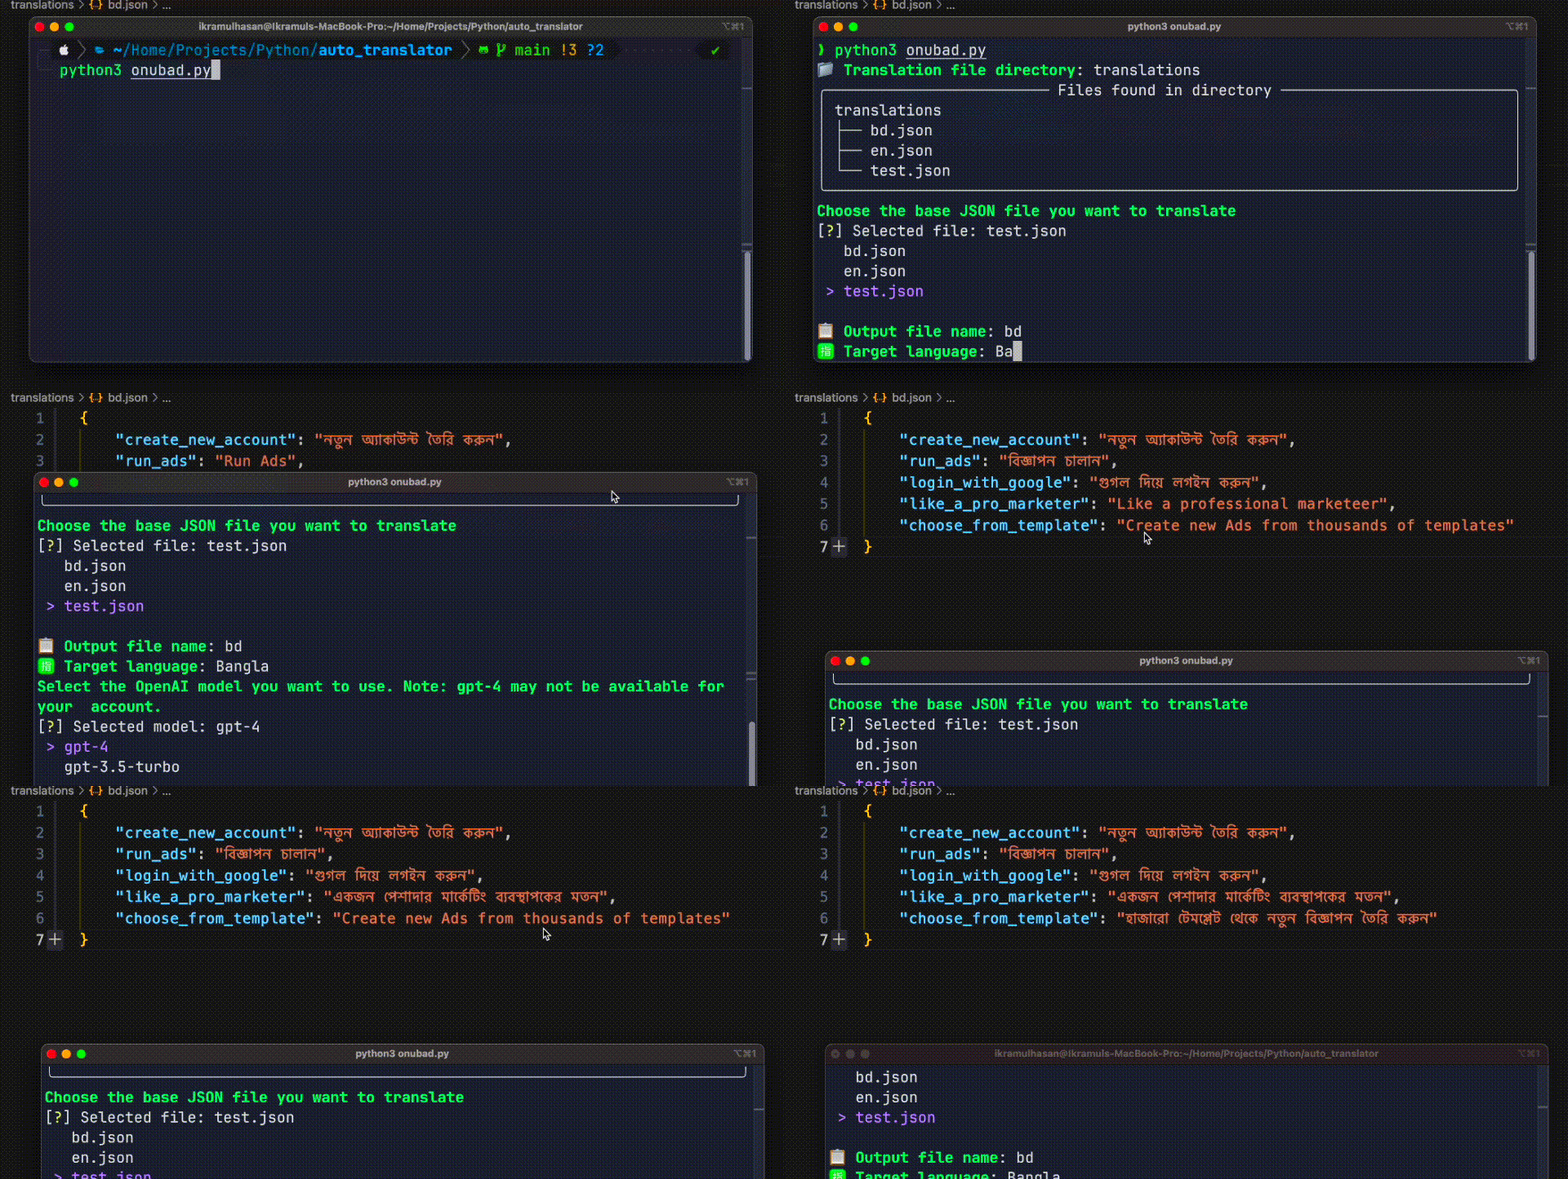
Automagically translate your entire app with just one command using AI ✨
Harnessing OpenAI GPT-4 for Automated Language Translation

First thing first
Thank you so much for all your support on my very first blog, titled How I Made a TicTacToe Game That You Cannot Beat 🙅♂️. It was featured both in hashnode and in daily.dev, and viewed almost 6000 times.
Introduction
In an increasingly globalized world, language translation is more important than ever. Localization is a key aspect in every app if you want to target users from all across the world. However, current solutions like localazy, localise, and locize can be very pricy costing you upwards of 500 dollars per month just to provide localization support to your app. Almost all of them charge you on a word basis which can get costly over time with multiple languages. And manually translating your app also takes a lot of time and money as you need to hire someone to translate them for you. To mitigate these issues, I used to primarily use Google Translate to translate my apps but this is also not ideal as the translation quality is very poor and lacks important app-specific context. But after trying out chatgpt I was really impressed with the translation quality. It performed as well as any native translator would. Hence, I made a simple Python script to generate translation files from one single base language file (en.json) in real-time and today I'd like to share the process of creating such a script with you.
Demo

Before I explain how I made this tool, let me show you how you can run it on your machine first.
Run the command git clone https://github.com/ikramhasan/Onubad-Translation-Automation-with-AI.git to clone the project on your device (Make sure you have git installed)
Run pip install -r requirements.txt in the project folder to install all the required libraries. If the above command doesn't work, Try running pip3 install -r requirements.txt . If that also fails, make sure you have Python installed and added to your PATH
Add your API key to the config so that you don't have to manually add it every time you run the project. In the project folder you'll find a file called config.json that looks like this:
{
   "openai_api_key": "your-api-key"
}
Here, replace the "your-api-key" text with the API key you generated. It should look something like this: sk-XXX...
Now that the setup is complete, run python onubad.py or python3 onubad.py to run the script. Follow the instruction given in the terminal and you should have a translated JSON file in no time.
Note: Keep in mind that the
gpt-4model may not be available to you. You need to join a waitlist for that. In that case, usinggpt-4will give you an error. use the modelgpt-3.5-turboinstead.
After running the command, you should see a newly translated JSON file in your directory (example: bd.json)
How it works
Every time you run the command this is the step the program goes through to translate your files:
-
Take the directory of the base translation file (ex: en.json) from the user
-
List all the JSON files in that directory and ask the user to select the base file that they want to translate
-
Ask the user to enter the name of the output file (bd.json)
-
Duplicate the base file (en.json) and rename it to the output file name (bd.json)
-
Iterate over each key of the JSON file and get the value
-
Translate the value with a custom prompt using OpenAI API
-
Update the output JSON file with the newly translated value
-
Repeat from step 5 until the entire file is translated
Dive into the Python script
Now let's look at how the script is able to do these tasks. The codebase is divided into different modules such as io_service.py, openai_service.py and prompt_engine.py to increase maintainability. Purpose of each module:
This module is responsible for all the input/output operations such as taking input from the user, listing all the files in a directory, reading and writing JSON files, etc. It uses the library rich under the hood to show the prompt and take input.
This is where we call the OpenAI API to translate the texts. In the future, we may have more services adding support for other LLMs.
This file returns the prompt that we send to OpenAI to translate the files. It currently contains one prompt, created to provide an easy way to switch prompts without much hassle. (Feel free to suggest a better prompt for creating translations.)
The main file you need to run. This file imports all the modules and allows you to call them from a single function for simplicity.
Limitations and future works
This is a very basic script that was made to match my personal needs. It is not yet suitable to be used in general. To be able to use it under any environment and project I need to add the following features:
-
Add support for nested JSON keys
-
Save the progress so that the user doesn't have to translate the entire file again when a new key is added
-
Add support for other LLMs
-
Turn it into a package so that we can publish it to pip and users can use it from the command line without running it from the source.
Thank you
Thank you for reading the entire article. If you want to connect with me on my socials, you can the links here: ikramhasan.onetapfolio.com
The code for this project can be found here: Onubad-Translation-Automation-with-AI